

An often-overlooked element of your thermal label printer is the printhead. The same goes for inkjet printers. Yet, the printhead is arguably the most important part of your machine.
With proper use, maintenance and regular care, you can extend the life of your printhead and ensure crisp, clear, high-quality printed labels.
Typically, you’ll know your printhead is failing when you see the following symptoms:
If you already experience these issues, it’s likely time for a new printhead. Next time, you can prevent a failing printhead by understanding why it happens in the first place.
RELATED: The Ultimate Guide to Thermal Printing
Over time, a printhead will fail because of the fast heating and cooling process that occurs as the printing elements switch on and off when passing over the media and ribbon. Another reason printheads fail is from the repeated pressure needed to produce a quality printed image. The harder the printhead works, the quicker it will burn out.
Expect a printhead on a thermal label printer to print up to one million linear inches of labels before needing to be replaced (about 250,000 4-inch labels). However, without proper printer maintenance and care, this yield will be substantially reduced. Proper care is critical to prevent burnout and extend the life of your printhead.
Some printer software comes pre-installed with a “maintenance mode” that allows you to run a self-clean cycle on your printer. In other words, you might be able to automatically clean your printheads right from your Windows desktop or Mac printer settings.
To begin, turn on your printer and insert some labels or print media. Based on your operating system, follow these steps:
Follow the on-screen prompts. If you have difficulty finding the self-clean function, your printer might not be set up for it. Consult the printer’s user manual or contact your Managed Print provider.
RELATED: Learn more about Managed Print Services
Like with the Windows process, if you don’t see a cleaning option, reference your user manual or contact your provider.
With heavy use, the need for a new printhead at some point is inevitable. You can take steps to prolong the life of your printhead, however, the first of which is regular cleaning.
Printhead cleaning supplies you might want to have on hand include:
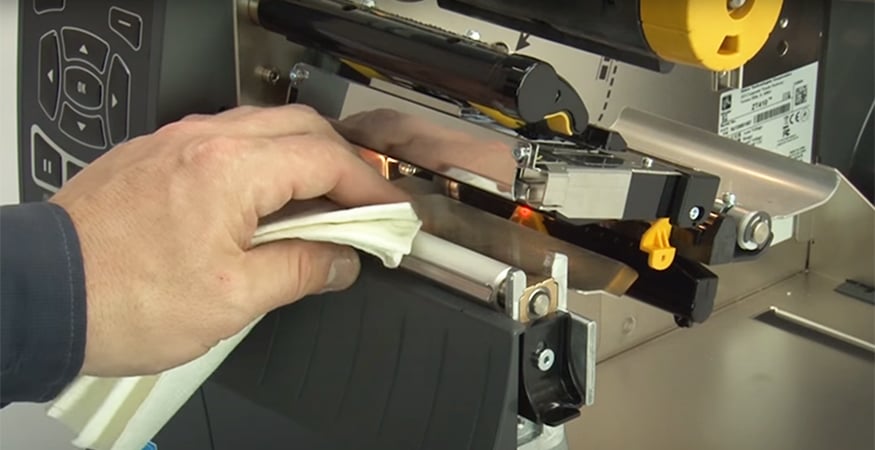
Using a printhead cleaning swab is one of the easiest ways to clean your printhead. Simply run the nib of the cleaning swab across the printhead to clean the entire area. This quick and easy step can be done each time you use your printer. At minimum, perform this small cleaning task each time you change your roll of labels.
Here’s a step-by-step method for manually cleaning your printhead using the printhead cleaning swab:
1. While you are not required to turn off printer power when working near an open printhead, Zebra recommends it as a precaution. If you turn off power, you will lose all temporary settings, such as label formats and you must reload them before you resume printing.
Before touching the printhead assembly, discharge any built-up static electricity by touching the metal printer frame or by using an anti-static wrist strap and mat.
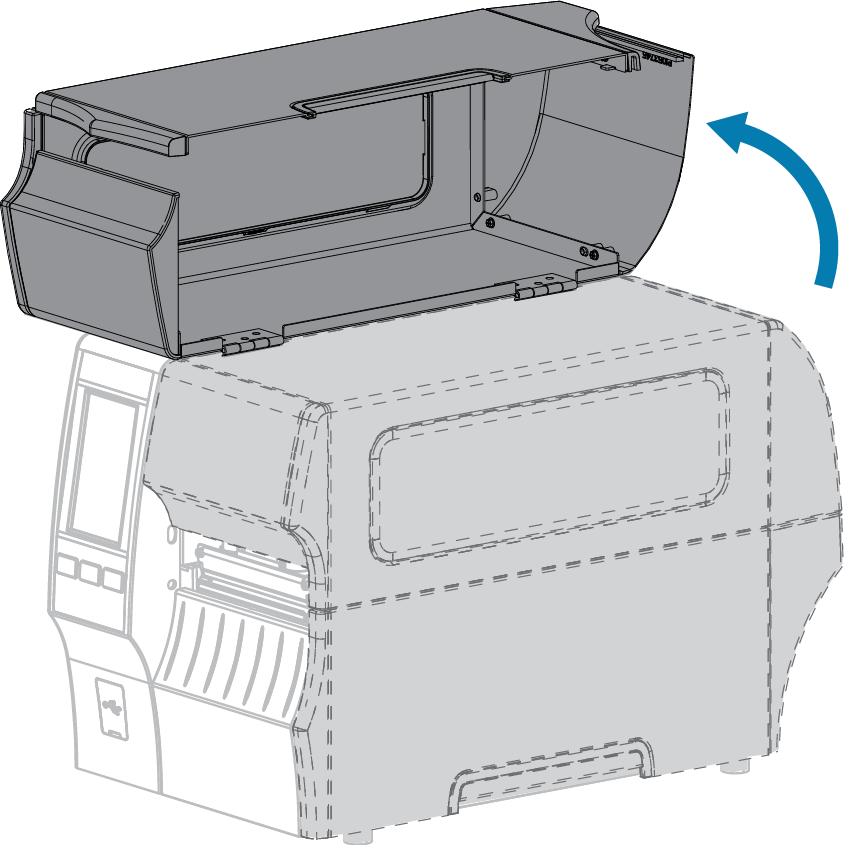
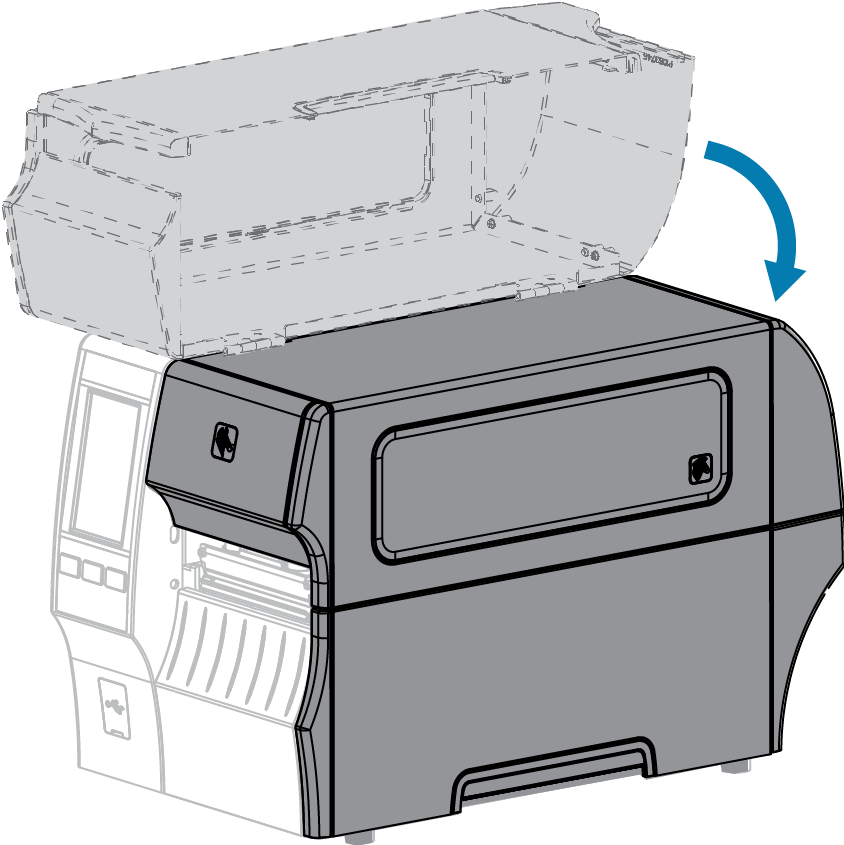
2. Raise the media door. Caution – HOT SURFACE: the printhead may be hot and could cause severe burns. Allow the printhead to cool.
3. Open the printhead assembly by rotating the printhead-open lever upward.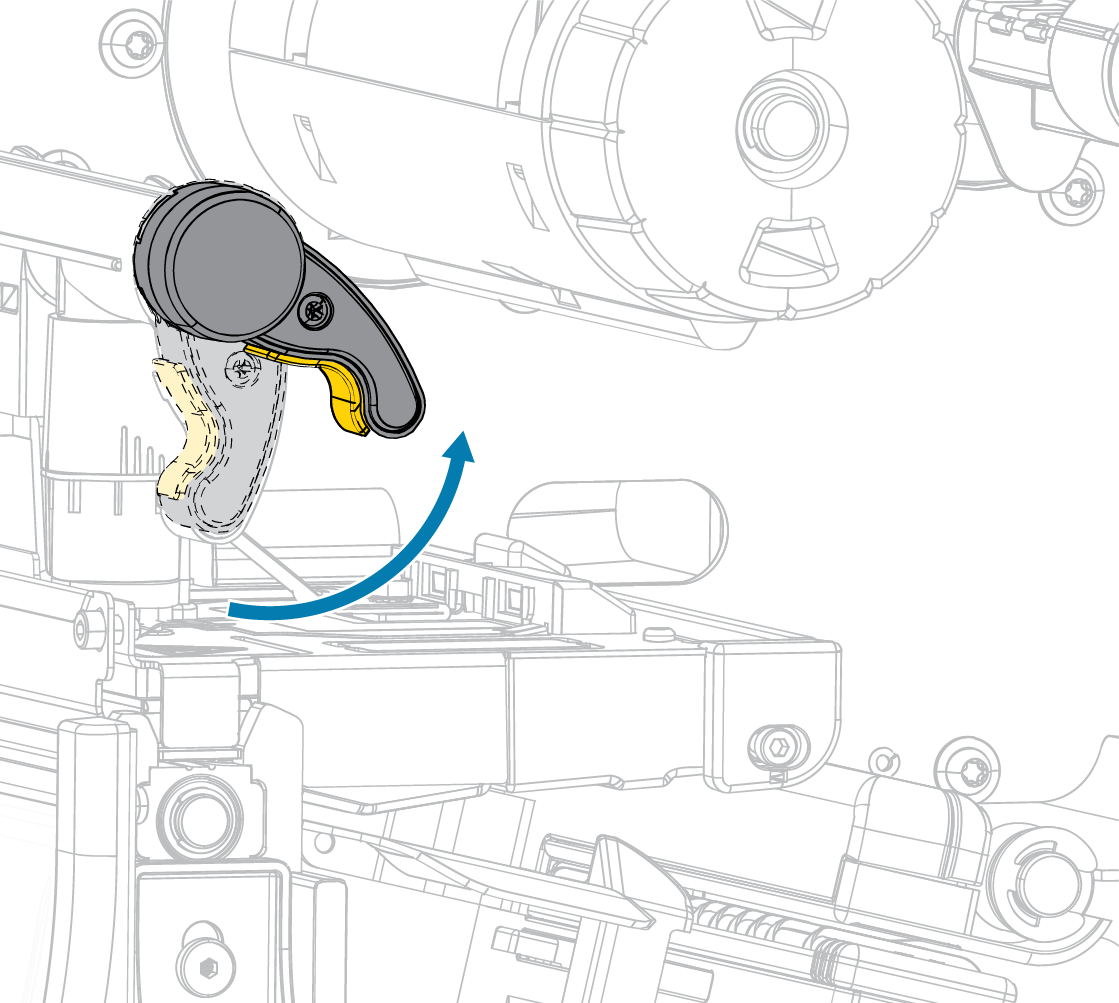
4. Remove the ribbon (if used) and the media.
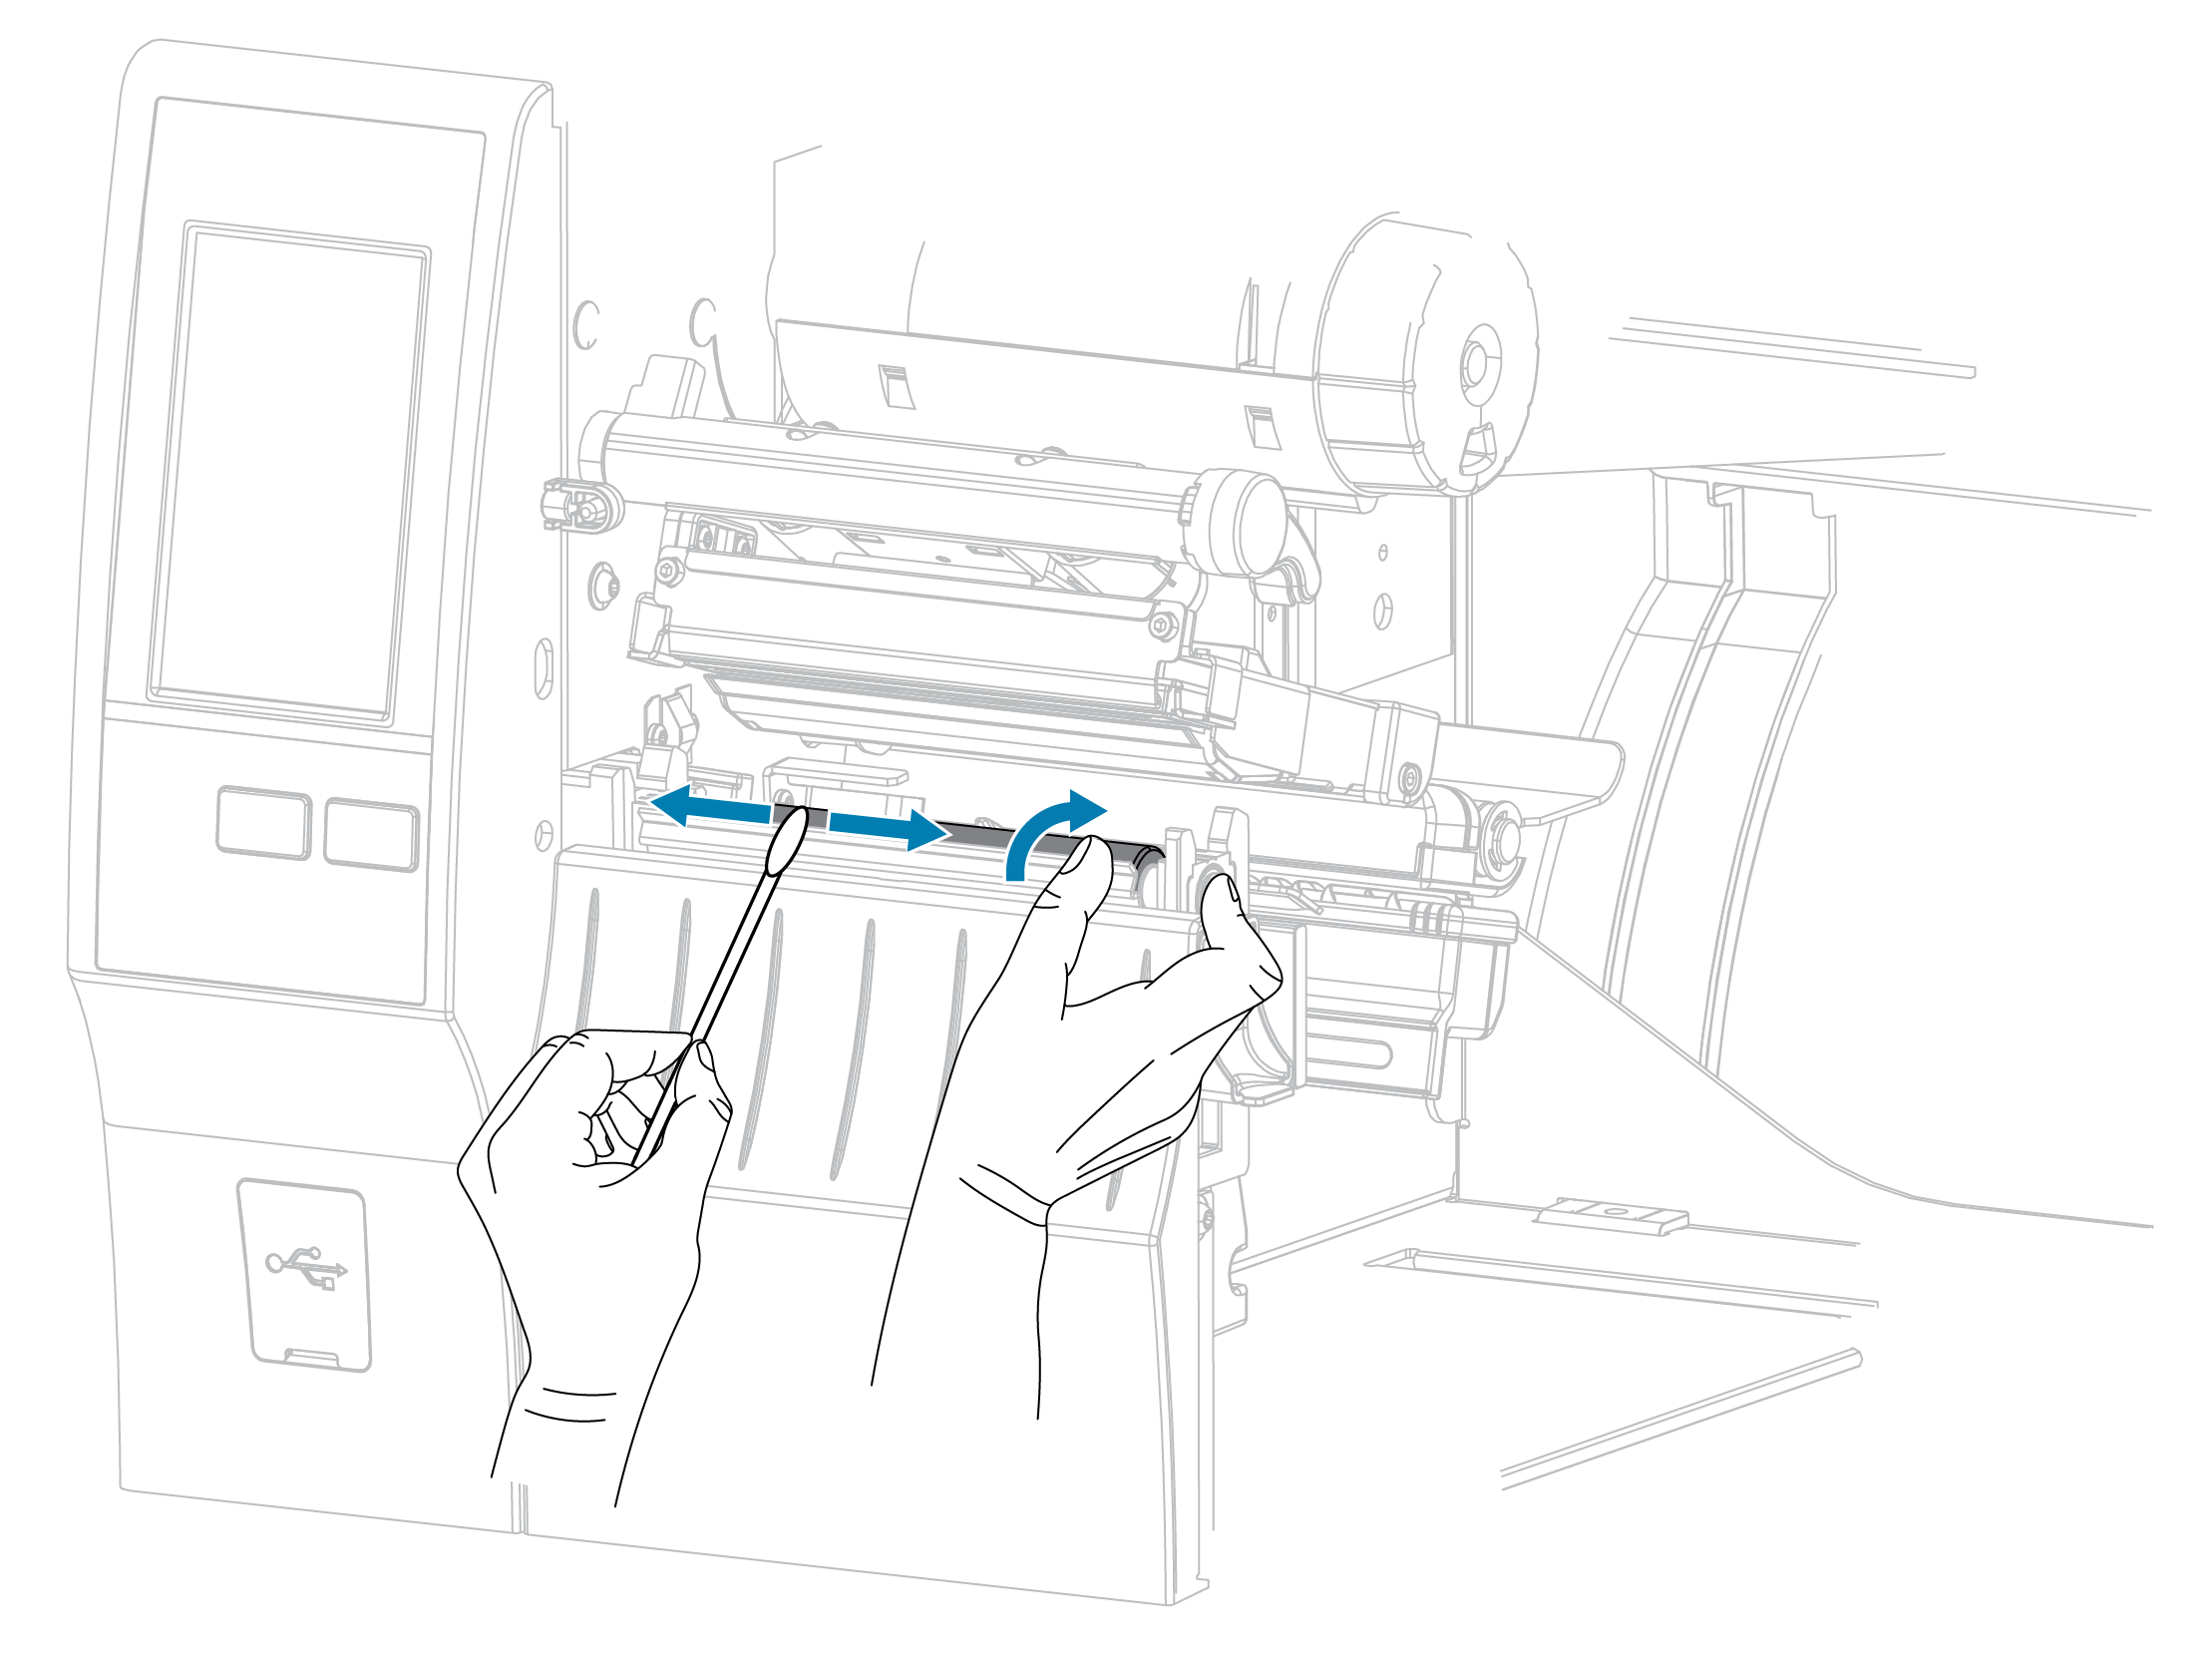
5. Using the swab from a Zebra Preventive Maintenance Kit, wipe along the brown strip on the printhead assembly from end to end. In place of the Preventive Maintenance Kit, you may use a clean swab dipped in 99.7% isopropyl alcohol. Allow the solvent to evaporate.
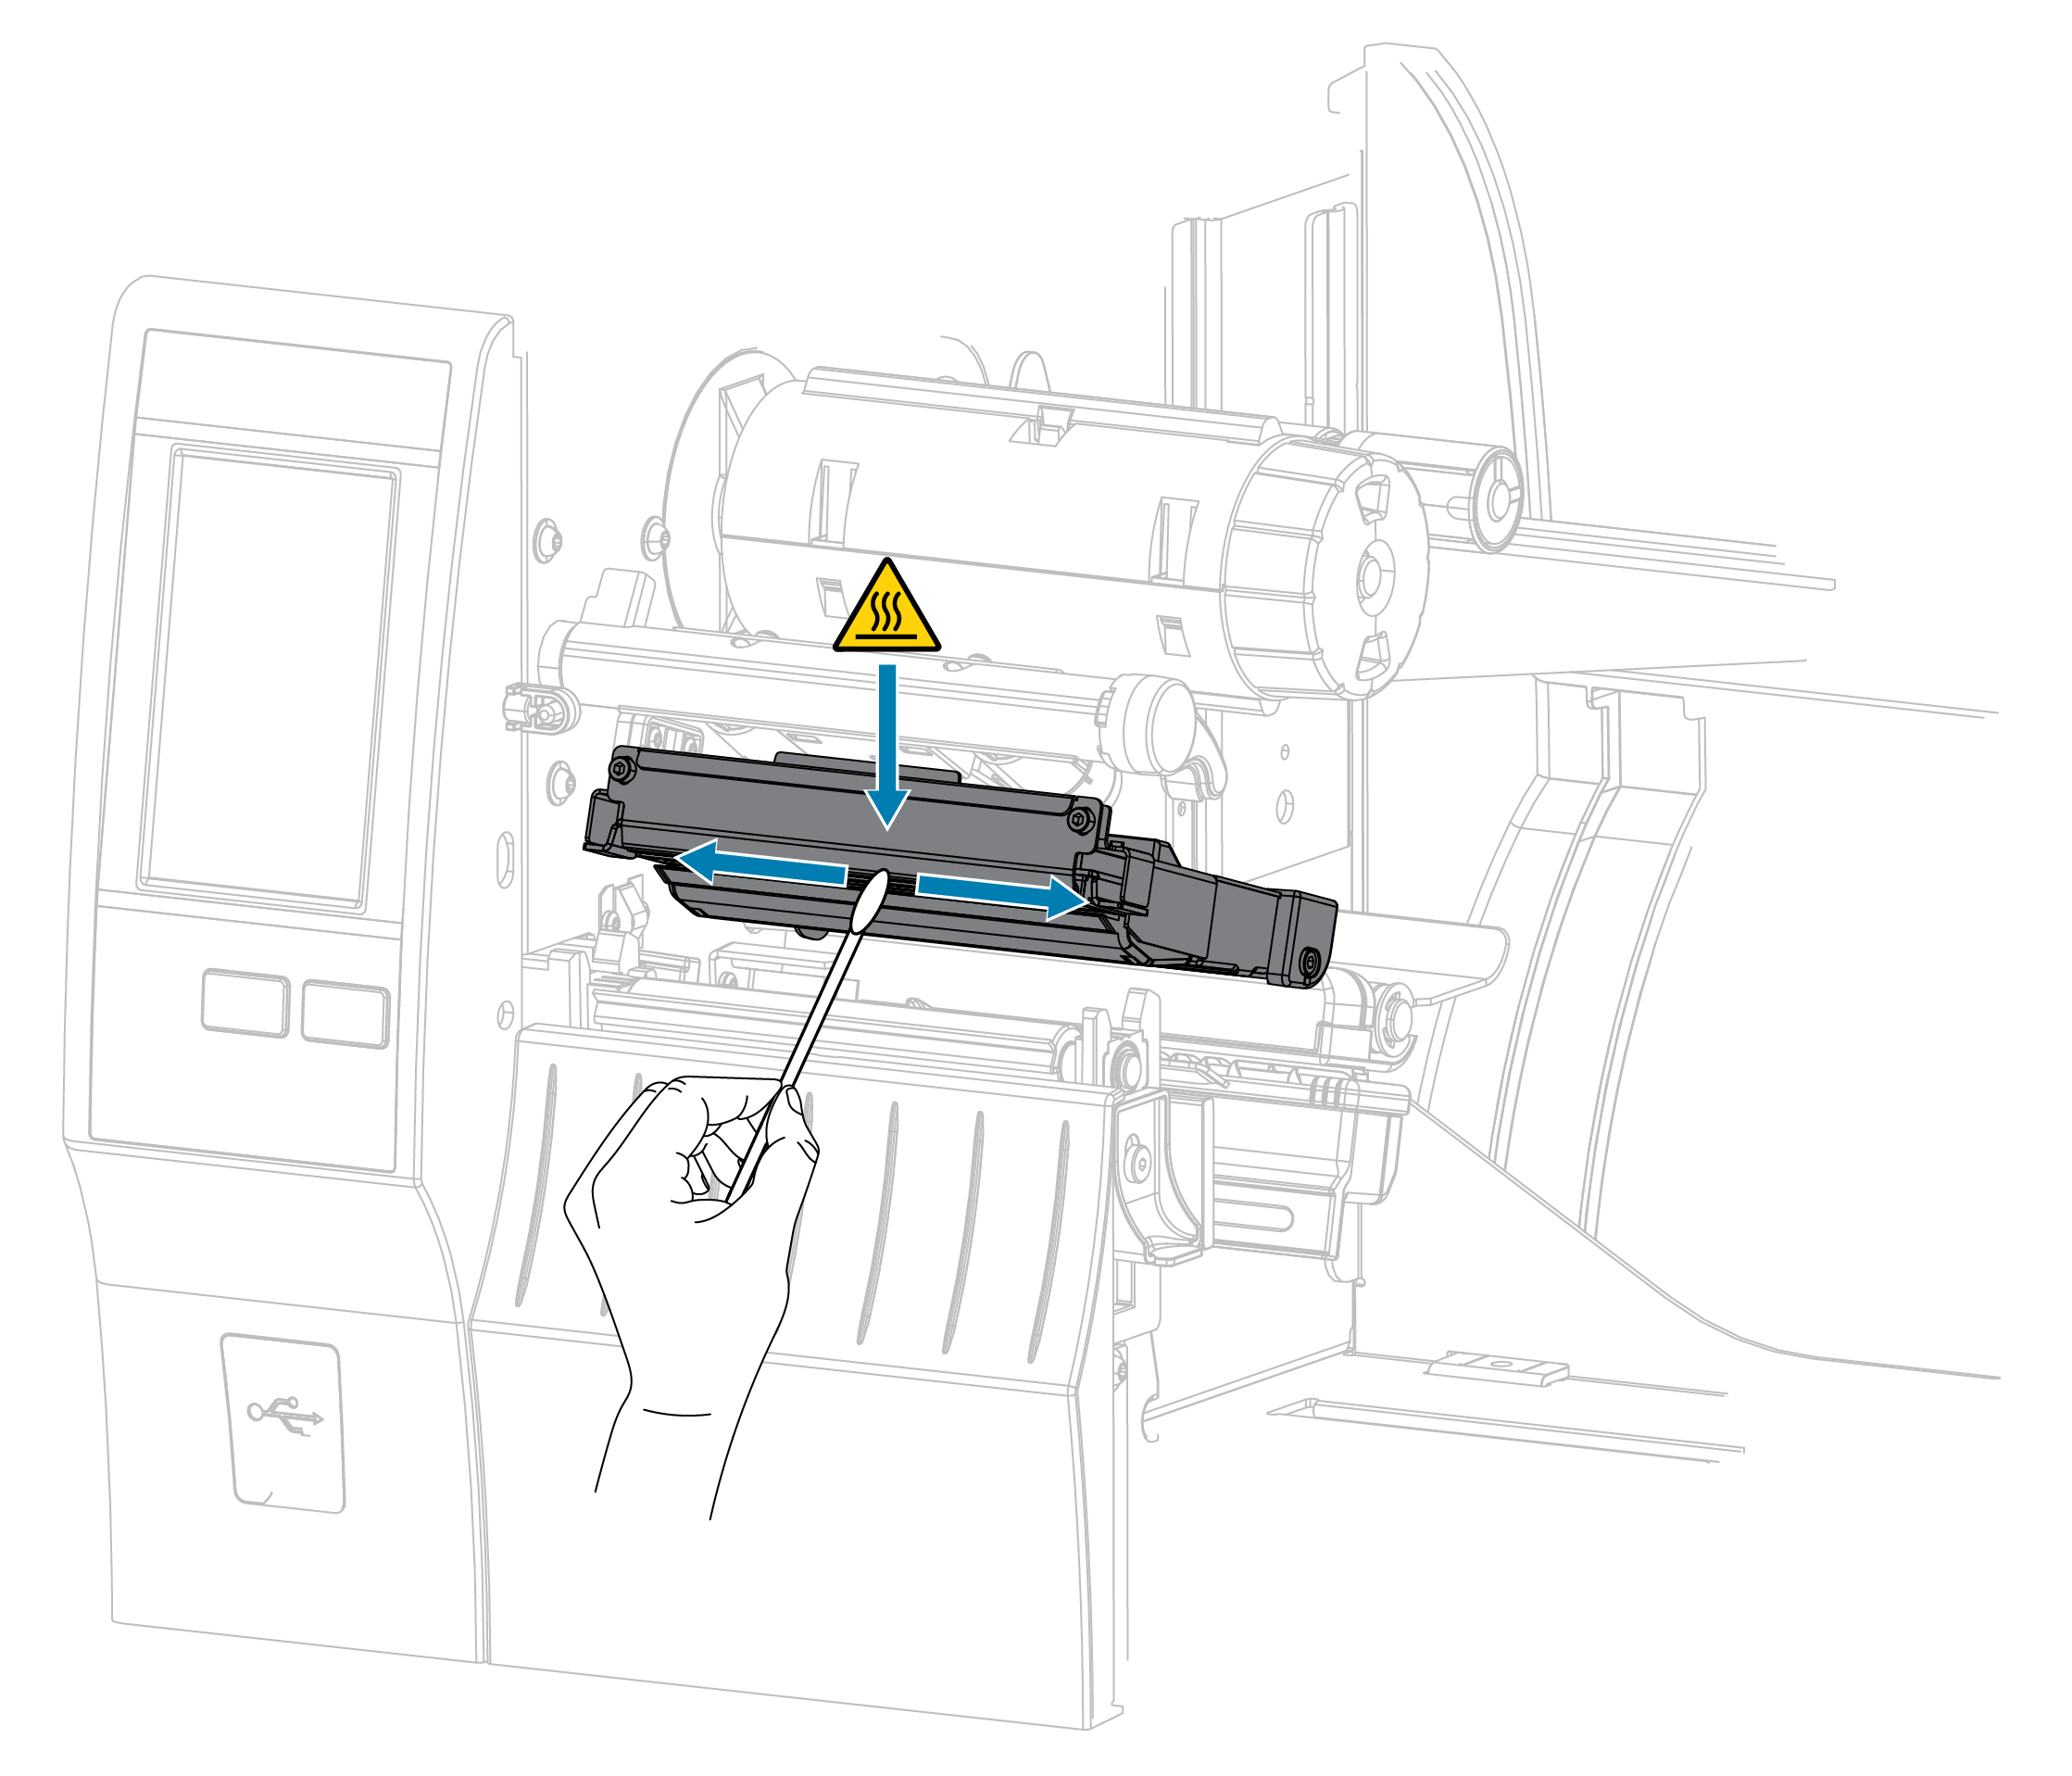
6. While manually rotating the platen roller, clean it thoroughly with the swab. Allow the solvent to evaporate.
7. Reload the ribbon (if used) and the media. For instructions, see Loading the Ribbon or Loading the Media.
8. Rotate the printhead-open lever downward until it locks the printhead in place. 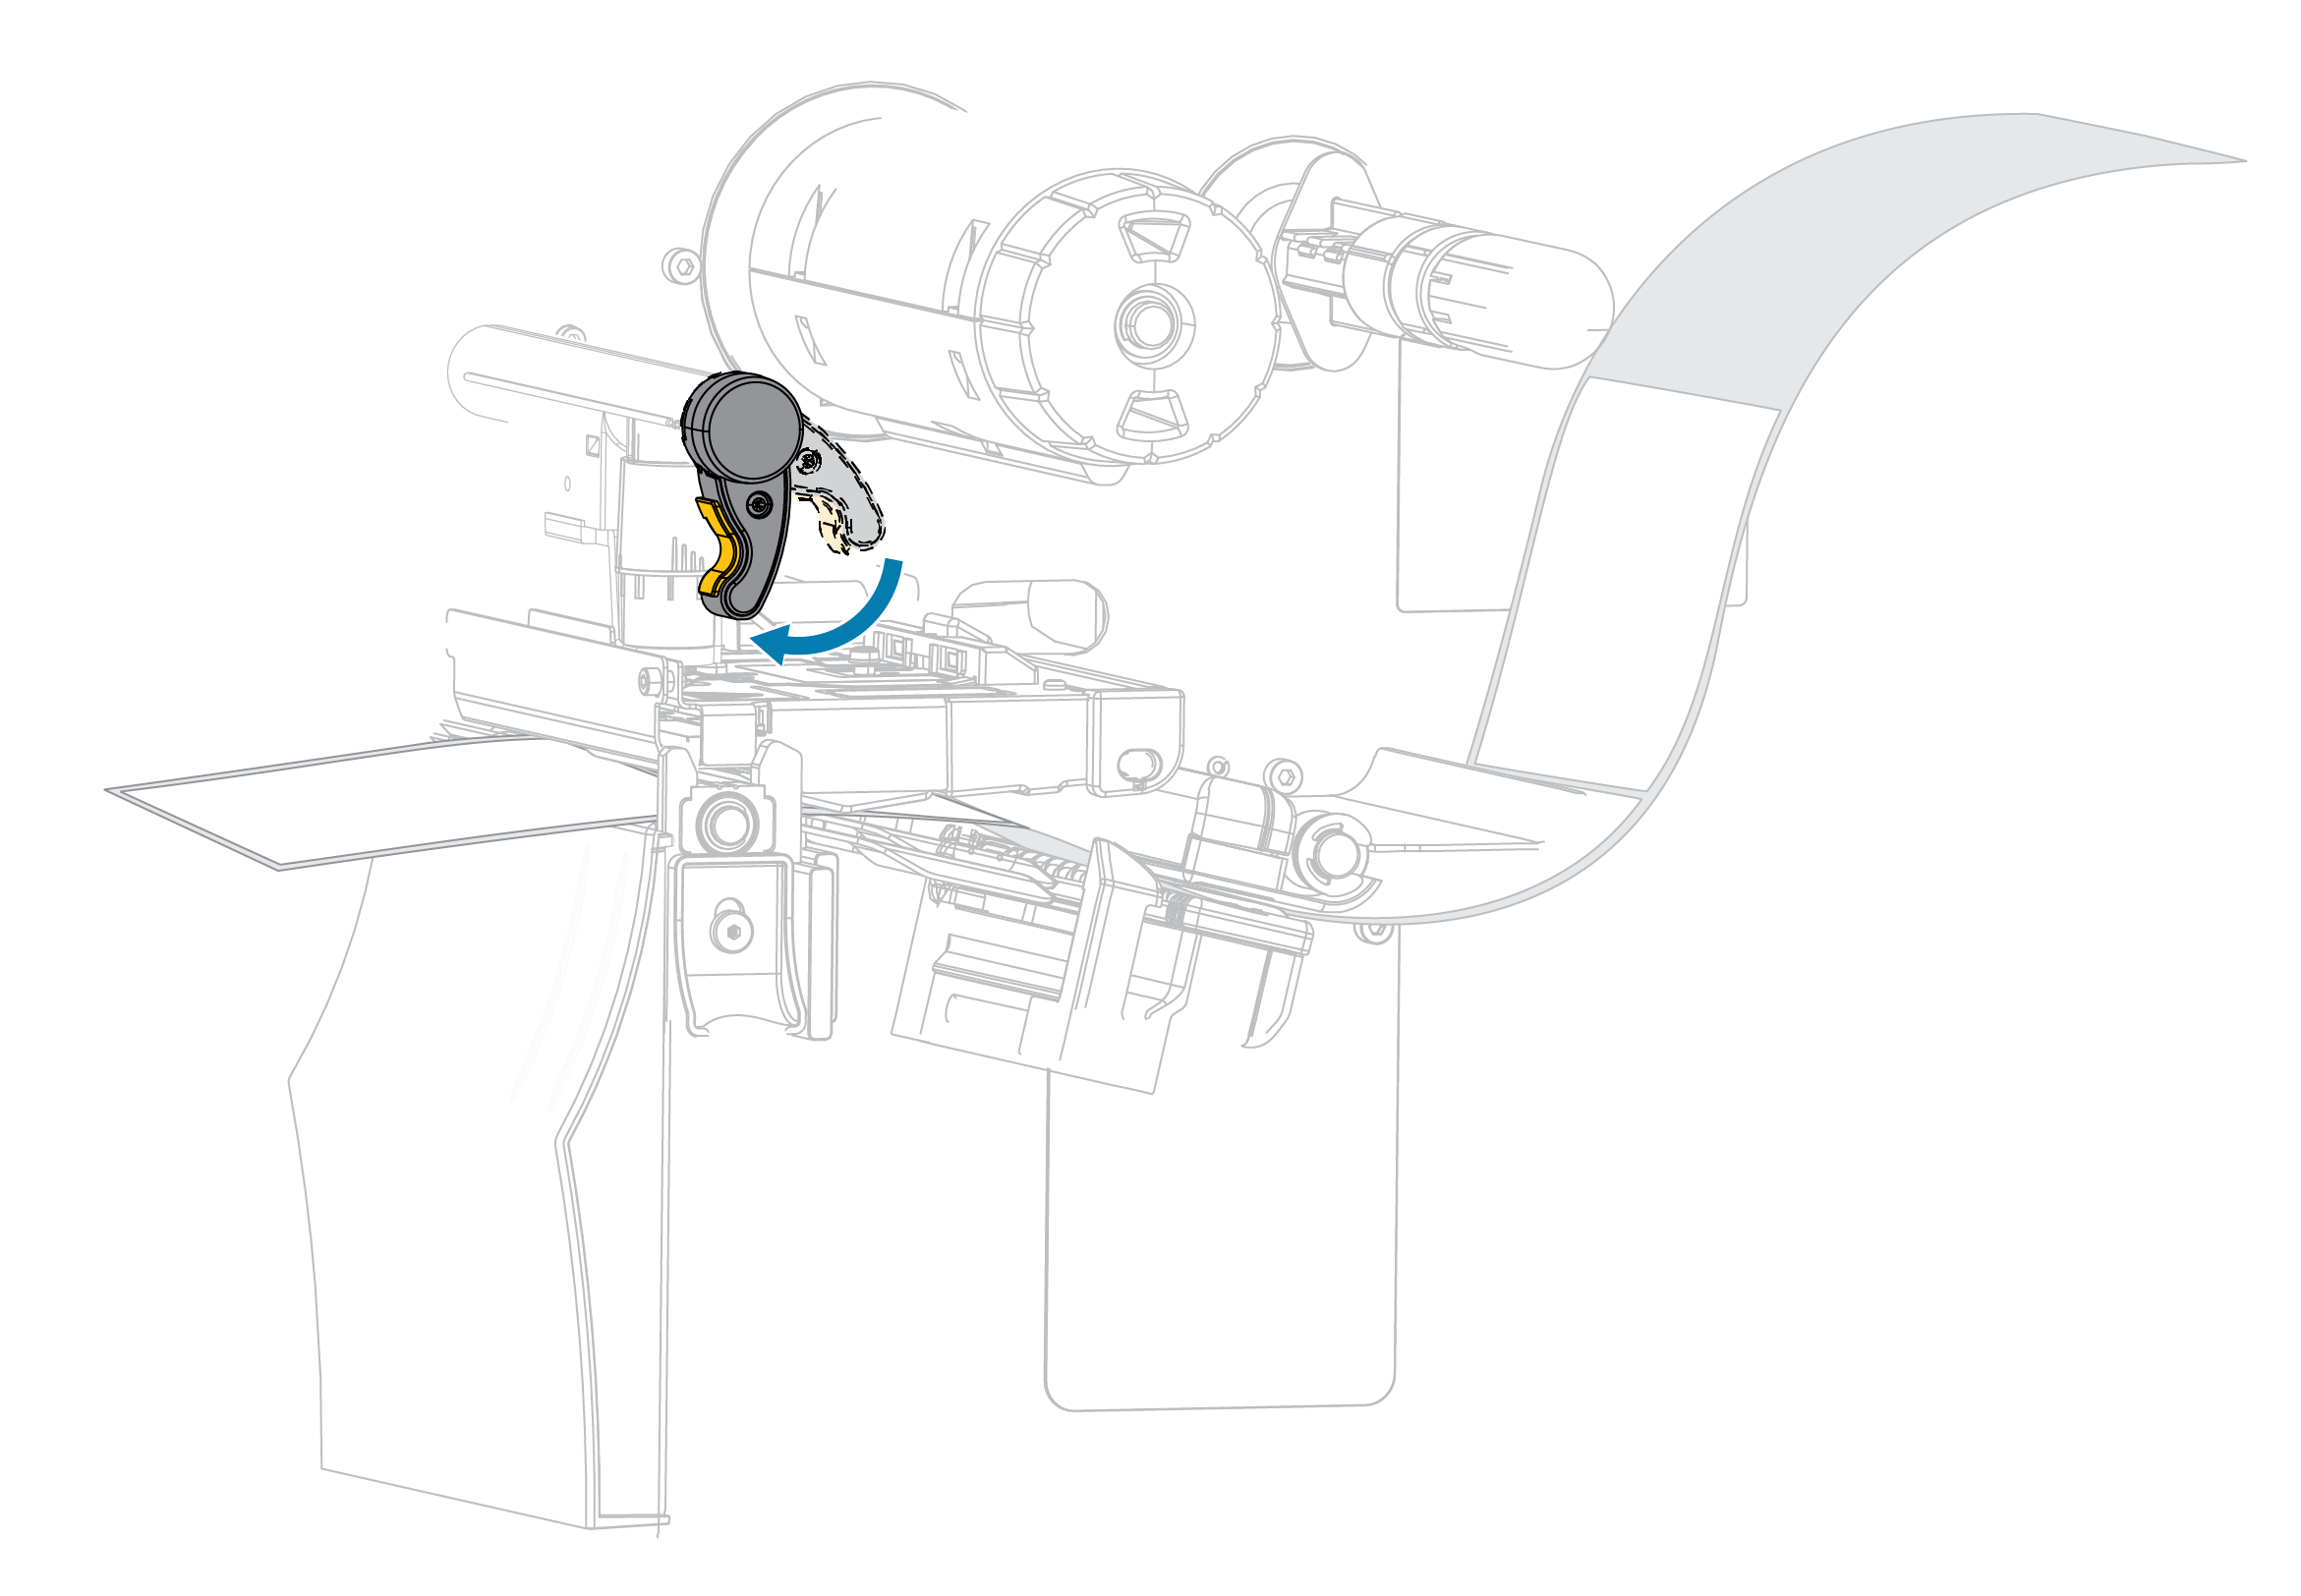
9. Close the media door.
10. The printer is ready to operate. Press PAUSE to exit pause mode and enable printing. The printer may perform a label calibration or feed a label, depending on your settings.
NOTE: If performing this procedure does not improve print quality, try cleaning the printhead with Save-A-Printhead cleaning film. This specially coated material removes contamination buildup without damaging the printhead.
You can also watch a video about cleaning Zebra brand thermal printers here.
In addition to maintenance, your printer settings can have a big impact on how long a printhead will last. Aim to use the lowest possible pressure and temperature to produce an acceptable printed image. Additional pressure and heat result in increased wear and tear. Depending on your printer model, you may need to check the printer cartridge and run a nozzle check.
Finally, use the right ribbons and label media. If the ribbon doesn’t fit the printer properly (i.e., if it’s too narrow or too wide), you risk scratching the printhead. Poor quality ribbons also require more heat and pressure to generate a good print image, reducing a printhead’s lifespan.
We recommend using genuine Zebra replacement ribbons. Likewise, Zebra certified labels provide the highest possible performance and print quality, and they produce less dust and build-up on the printhead. If you use direct thermal labels that don’t require a ribbon or ink cartridge, then we recommend genuine Zebra direct thermal labels for the same reasons.
RELATED: How Thermal Printing Media Differs from Regular Printing
We’re proud to offer Zebra thermal label printers and supplies, and stock a wide range of Zebra printheads. Plus, we offer Managed Print Services to ensure everything runs smoothly. Contact us today to see how we can give you the right tools, expertise and resources to handle your complex printing and logistics demands. And check out our Beginners Guide to Managed Print below to see the Gordon Flesch Company difference.